Last Updated on
By Joel Zielke
Binoculars are one those things that seem to be everywhere. I remember as a kid riding in the jump seat of my grandpa’s truck there was a pair riding next to me. If you stop by any of my friends’ houses today, there is probably at least one set laying around somewhere. Birders, hunters, hikers, police officers, sports fans – the list could go on and on of the people that use them. There are so many uses for a device that promises to bring us closer to the action. Unfortunately what seems like a relatively simple task (to make a visible image bigger) is actually incredibly complicated and requires a lot of technical know how and expertise. Both fortunately, and unfortunately, there are a lot of manufacturers, price points, lens coatings, and styles available. There are a lot of products out there, so you should be able to find something that suits your needs easily, but it can be quite overwhelming when looking at all the options available. The goal here is to provide a general overview of specifications and what those specifications mean, and we will also touch on considerations when picking out a set of binoculars.
Binocular Terms
Let’s start with some generic information and some glossary words and proceed on from there.
- Magnification and Objective Lens Diameter: Understanding what a manufacturer means when they say 7×30, 7×50, 8×36 or 10×42. The first number is the magnification power of the binocular, and the second number is the objective lens diameter in millimeters. A7x30 binocular has a magnification power of “7” and a objective lens diameter of “30mm”. A 7×50 would be a magnification power of “7” and a objective lens diameter of “50mm”.
- Magnification: To get a better understanding of what magnification means, we have to do a little math. A pair of “7x” binoculars will make something look seven times closer. Let’s say we are looking at something 100 yards away. The item that is 100 yards away will look like it is roughly 14 yards away with a pair of “7x” binoculars. The math equation is the distance you are viewing the object divided by the magnification power of the binocular. (distance)/(magnification power)=. Or as in the above example: 100/7=14.3.
- Objective Lens: The outermost lens that faces whatever you’re viewing. A larger lens will generally allow an increase of light into the binocular. It will also allow a larger exit pupil diameter at a given magnification level. An increase in light and a larger exit pupil diameter are typically beneficial in lower light applications.
- Exit Pupil & Diameter: The exit pupil is the visible light seen through a binocular. The exit pupil diameter is the physical size of the visible light seen through a binocular. This is typically identified by dividing the the objective lens size by the magnification level. (objective lens diameter)/(magnification power)=. So in the instance of a 7×30 pair of binoculars, we would have a formula that looks like this: 30/7=4.29, which would give us a 4.29mm exit pupil. As noted above, typically the larger the exit pupil, the better the low light performance.
- Eyepiece: The part of the binocular you look through.
- Angular Field of View: This one may be a little difficult to conceptualize, but we will give it a go. Let’s assume we are standing in the middle of a giant circle – a circle is 360 degrees around. The angular field of view is the section of the circle that is visible through the binoculars, measured in degrees of the circle.
- Field of View: This would be the physical measurement across the image you see at a given distance.
- Close Focus: The closest distance upon which the binoculars will focus.
- Inter-Pupillary Distance: The minimum and maximum spread of the binoculars between the exit pupils.
- Lens Coatings: Lenses may be uncoated, single coated, or fully-multicoated. The purpose of the coating(s) is to prevent distortions in the light that is transmitted through the binocular. Typically fully-multicoated is the best.
- Barrel: One side of the binoculars that transmits light through it.
- Dioptric Compensation: The ability to adjust for focus differences between two eyes by fine focusing one barrel after setting your main focus. This allows for a clearer image.
- Eye Relief: Distance between your eye and the closest lens. Typically, this is most important for those who wear glasses, where more distance is usually better.
Binocular Types
The second thing we will cover in our quest for a better understanding of all things binocular will be the three major types of binoculars that are encountered in the marketplace today.
- Porro Prism: According to the Merriam-Webster dictionary, the technical definition of a Porro Prism is: “An optical device that inverts and reverses right and left an image viewed through it, that consists of a pair of isosceles right-angled prism so arranged that beam of light entering the hypotenuse face of one is totally reflected twice before emerging at the same face and entering the second prism at its hypotenuse face and being again doubly reflecting, and that makes possible a shortening of the physical length of the instrument in which it is used.” When you think of a “traditional” set of binoculars, these are most likely what you are thinking of. The objective lens is offset from the exit pupil in these binoculars.
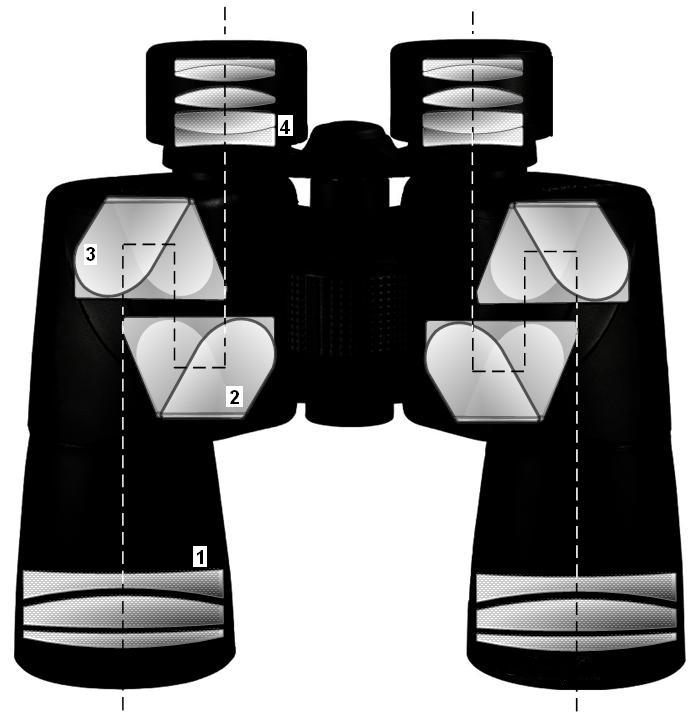
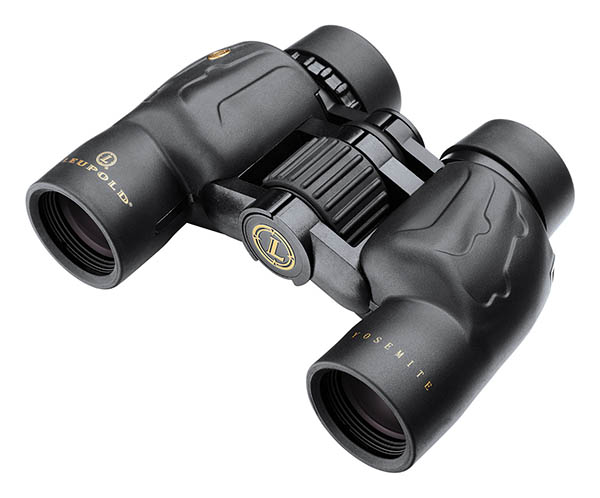
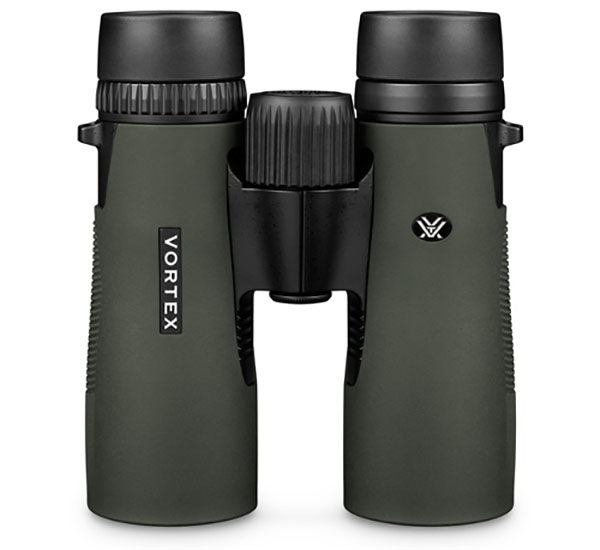
- Roof Prism: Merriam-Webster lists a Roof Prism as: “A glass prism used in an optical range finder and other instruments that performs the double function of changing the direction of the light rays by 90 degrees and reversing the image right to left.” The roof prism is most easily identified by the objective lens and the exit pupil being in-line. Roof Prism binoculars have replaced Porro Prism binoculars as the popular design on the market today.
- Galileo Binoculars: These will bear a certain resemblance to the previously mentioned Roof Prism binoculars in the sense that the objective lens and exit pupil are in-line. However that is pretty much where the similarities end. Galileo binoculars lack the use of any prisms and rely totally on the lenses. Galileo binoculars are most often used in low power uses such as theatre/opera glasses.
Basics On Selection
When it comes to actually selecting a pair of binoculars there are many things to consider. How close am I to what I am looking at? How large is what I am looking at? These questions deal with how much magnification I need. Lower light application or sunny daytime? This relates to your Objective Lens diameter and the Exit Pupil size. I wear glasses, how will this affect me? Better find a set with longer eye relief. How tough does the housing need to be? These are the things you must ask yourself, and answer when looking at binoculars. Unfortunately, I can’t make that determination for you. However, armed with the information above, you can find what will work best for you.
How to use your new set of binoculars
- The first step to using your binoculars is to properly set the inter-pupillary distance. When this is set correctly, you should see a single round image. If you are looking through binoculars, and you see double rings like in the movies or cartoons, it is not set correctly. This will strain your eyes and lessen the quality of the image.
- Next you need to adjust the focus. This will be a two step process for any pair of binoculars that have both a central focus and a dioptric focus. If you only have a central focus, adjust it until the image is clear. For binoculars with an additional dioptric focus, you must first determine which barrel the dioptric focus adjusts. For this example, let’s say the dioptric focus adjusts the right barrel. When you are ready to focus your binoculars, you must close the eye that sees through the dioptric function (right eye), and adjust the central focus until the image is clear in the other (left) eye. Once that is fully adjusted, you must close the eye that was previously adjusted (left), and open the other (right) eye. You may now adjust the dioptric function to better focus the other (right) eye. Once it is as clear as possible, you may open both eyes and begin using your binoculars. It should not be necessary to refocus the dioptric function every time you refocus the binoculars. However I have used binoculars that did require more “fiddling” with than others.
I hope this has been beneficial to you. I know if I knew what I was doing years ago, I may have enjoyed using binoculars more. As it was, I could barely stand to use them, especially for any extended period. They were big and heavy, or they hurt my eyes. More than likely I just didn’t have them focused well. There is plenty of intensive reading out there on this topic, including some with different ways of testing binoculars against each other. A couple of examples of more in-depth text would be A Simple Guide to Telescopes, Spotting Scopes, and Binoculars by Bill Corbett, or Outdoor Optics by Leif J. Robinson. Of course there are many more worth reading, but these two were helpful in the writing of this article. Ultimately, binoculars are incredibly useful tools, but they will only be used as much as they are convenient If you get the wrong binocular for the job, it isn’t very convenient. Take care in selecting the right binocular for your application, and it will be well worth the money spent.
Image two courtesy of Wikimedia Commons.
Interested in more? Check out: Vortex Crossfire 8×42 Binocular Review.
Shop gritroutdoors.com
