Last Updated on
By David Link
We just recently covered how to build a bug out bag in two parts, and stocking up a bug out bag for emergencies can get you thinking about wilderness survival. While your bug out bag won’t always be needed for wilderness survival, it should have all the basic gear required for such an endeavor. We recommend reading The Basics On Building A Bug Out Bag and Extra Items For Your Bug Out Bag to get a better understanding of what exactly survival gear entails.
Even though you won’t be carrying your bug out bag with you on regular outings into the wilderness, you should always carry some essential survival tools. These include at the very least:
- Fire Starting Materials (two options)
- Reliable Knife
- Extra Water (water filtration is a bonus)
- Extra Food
- Basic First Aid
- Headlamp
Now that’s a very scant list, and you can certainly add extra gear to it, but you should never leave on even a medium-length day hike without those materials. Now if it’s a paved one mile loop in a busy state park, you should be fine with just food and water as long as you’re not venturing way off the path. But a lot of us like to bite off a bit more to chew, and it can be a bonus to go to places where there are not many people around. Scenarios like this can include long day hikes, scouting for hunting opportunities, and gathering wild edibles like mushrooms etc. Although the chances are very slim you’ll get lost or stranded, things can always go wrong, and a bit more gear / weight in your pack could just save your life. Let’s go more in depth on the basics of wilderness survival should the unthinkable happen.
1) Before You Leave
This first step is vitally important, and it is very easy to accomplish. Before you leave your house, be sure to let someone know where you’re going. It doesn’t matter if you’re picking wild mushrooms or going on a day hike in the mountains, leave a note. Written directions are very important, so don’t just tell your wife or roommate where you’re going through conversation, they might forget or mix up the details. Write down on a piece of paper where you’re going, how long you’ll be gone, and what you plan to do. This way if you don’t show up, someone will know where to start looking. It may seem like this is overkill, but if you’re going to a large section of wilderness, there’s always the chance you might get lost or hurt, and you don’t want to be kicking yourself after the fact.
2) What To Do When Things Go Wrong
Even when you’re careful, things can go wrong. You can slip and fall injuring yourself, get caught in dangerous weather, or even just lose your way accidentally. Any number of scenarios can create a panicked moment where a pleasant hike or hunting or fishing trip can turn into a dire situation. The number one piece of advice for this occurrence is to stay calm. Panicking and taking off in a frenzy can get you more lost most often than not, and if you’re in a medical emergency, you’re going to need to keep your head to get through it. Take a deep breath and give yourself a few minutes. Sit down and examine where you are if you’re lost, or focus on your injury first and not how the hell you’re going to get home. Just like in life, those who stay calm can react to adverse circumstances better, so don’t be the unfortunate victim who runs off screaming in the wrong direction. You can get through this if you keep your wits about you.
3) Stay Or Go?
Once you’ve calmed down, now is the time to determine whether you’ll stay or go. First, establish the time. If sunset is an hour away, then you may want to stay put vs. trying to hoof it back to your vehicle only to get stranded in the dark. An injury could especially influence this decision. But if you have a good chunk of time, then look around for landmarks. Do you know the general direction towards where you parked? Is there a natural landmark like a river or a tall hill / mountain that you can use as a reference point?
Whatever you do, consider the place you are as ground zero. Establish where you are with your own landmark, and then do small scouting missions from this point. This way you don’t get further away from home, and you won’t end up wandering around making yourself significantly more lost. Walk several hundred yards in the direction you think may be correct and look for landmarks that you noticed on the way in. If that direction does not seem like the right one after you’ve scouted for a while, then go back to ground zero and start again. You can do this until you start to run out of daylight. In that case, you’ll probably have to stay if you can’t find a decent lead on the correct way out. Nothing is worse than trying to navigate the wilderness in complete dark. This is a good reason to bring a headlamp with you, but you’ll want to work on shelter far before it gets pitch black when you’re lost.
4) Shelter – Fire – Water – Food
Shelter
It may seem like the end of the world, but if you have to stay, then it’s wise to prepare for it before the sun goes down. You’ll have three main priorities when you decide to stay: 1) shelter 2) fire 3) water 4) food in that order. The logic goes that exposure to the elements can endanger your life in only a few hours, especially when hypothermia comes into play. So shelter will be your main priority. While everyone fantasizes about a luxurious survival shelter, there isn’t going to be much time for shelter building. Great options for temporary shelter include huddling under the limbs of a large pine tree and taking cover in any natural overhang.
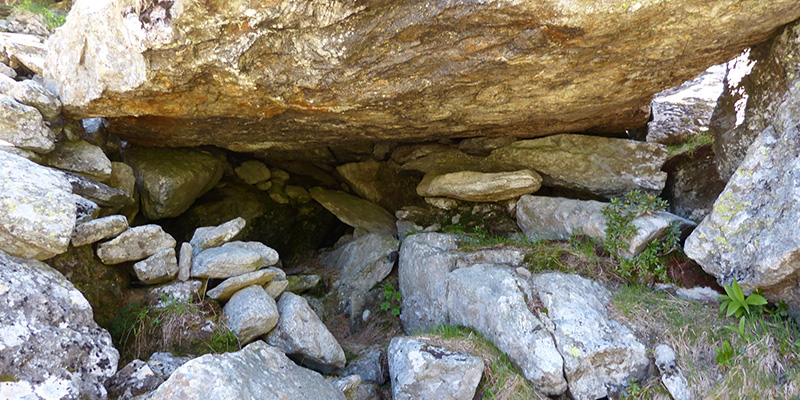
The goal is to keep rain or snow off you for the night as well as conserve warmth as best you can. Pine boughs or live limbs can make great shelter materials, but they can take some time to gather depending on where you are. If there are no quick shelter options, then you can build a quick A-frame shelter with limbs, but be weary of the time investment that this takes. A good knife can help you cut live branches like pine boughs, but don’t waste your time trying to cut down the large pole that forms the roof. Try to salvage a fallen tree or better yet find a fallen sapling that already serves the purpose.
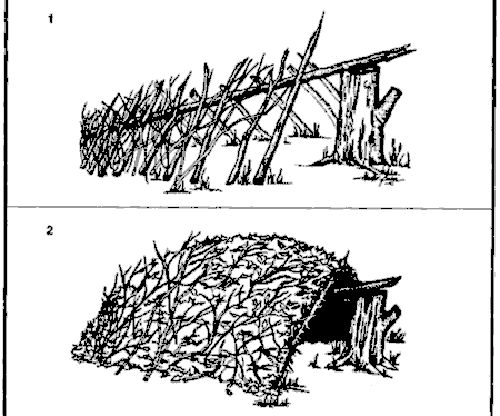
Note: Be on the lookout for dangerous elements in shelters. Don’t camp under a large fallen tree that might settle while your asleep or an overhang that might fall on you unexpectedly.
Fire
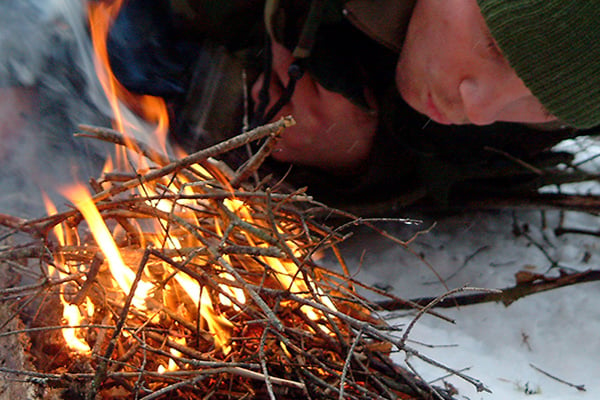
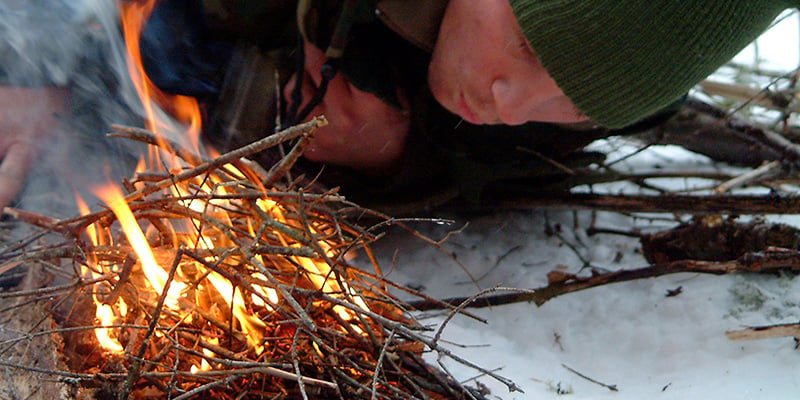
Once you have an acceptable shelter, then you can turn to building a fire. Fire can keep you warm, keep wild animals at bay, and provide a degree of psychological comfort in an emergency. While it may be tempting to start a fire first, rain or snow can always extinguish your fire, so shelter will always be the first order of business. Hopefully you’ve thought ahead and brought at least two options for fire with you. Now you need to gather kindling of various sizes from dried grass and bark all the way up to larger logs for sustained warmth. Always gather more than you think you’ll need, firewood burns faster than you want it to. It is also important to take your time and build up the proper structure for fire before trying to light it. The “log cabin” structure is a winner for this strategy, and if you build cabin walls and the roof with small to medium sized twigs and place fire starting materials like dried grass in the middle, you’ll have a lot of luck keeping your fire going once started. As the fire picks up, add larger logs to it.
Note: Always build a fire a safe distance away from your shelter. If you’re camped under an overhang, the change in temperature can cause rocks to split and crash down on you. On the other hand, if you’ve built a shelter out of wood, a close fire could turn your shelter into a large bonfire, which is not what you’re looking for.
Water And Food
Once you’ve addressed shelter and hopefully fire, it will probably be dark. Don’t head off looking for a stream to drink from, even if you’ve exhausted your water. If there is one close then great, but drinking from it could mean sickness if you don’t have a water filter or vessel to boil water in with you. For those circumstances where you must drink right from a stream, find where the water is running fastest and try to drink directly from there. But hopefully you’ll have some water left from the day, and you should just ration that. You can go up to 2-3 days without water, and even though it won’t be pleasant, try to endure the night for now. The same goes for food, ration those extra energy bars or whatever you have in your pack, but since you can go three weeks or so without food, this shouldn’t be much of a priority now.
5) The Next Morning
Now that you’ve made it through the night, today will be your biggest push to make it out. You’ll likely be up as soon as first light shows, and don’t delay. You’ve got a full day to find your way out, and by now your friends or family may have alerted authorities that you’re missing. If you’re hurt and self-rescue is looking unlikely, then starting working on your signalling options. Signal fires can do the trick as long as you’re not in dense forest, but remember that a signal fire should be constructed safely without the risk of setting the surrounding forest on fire. It’s not so much about the fire as it is the smoke anyway, so find a good place to signal, build a starter fire structure there, and wait. In the meantime gather green boughs from trees. Once you need to signal, start the fire and get it going well. You can then throw the green vegetation on top to create extra smoke, but be careful not to extinguish the fire.
If you have to stay longer, your challenges will increase, and you’ll have to take a chance at drinking from a natural water source. This is why a water filtration device like filtration tablets, a UV pen, or a personal water filter will be a good investment. Even if you add one to your pack, always bring extra water. You never know if a reliable water source will be around. Food remains the lowest priority, and you can always beef up your shelter and gather more materials for a fire on day two. The key here will be to endure and wait for rescue if people know where you are. If they don’t, then you’ll have to make your own way out, which can pose its own challenges, especially when you’re injured. Just remember to keep the shelter-fire-water-food hierarchy in mind as you try to escape.
There is so much more to cover on the topic of survival, but these are the basics. We’ll be examining more advanced topics in the future.
Images one, two, three, four and thumb, five and six all courtesy of wikimedia commons.
