Last Updated on
Cooking over the campfire takes on a new meaning when fall arrives. Burgers and hot dogs are great for warm weather. When there’s frost in the morning and a chill in the air all day, it’s time for hardy meals that stay with us.
Most of my campfire cooking is done in cast iron. It’s heavy duty and dependable. You can bang around on backwoods roads without worrying about the cookware. It has a rustic feel that takes you back to the old days when campfire cooking was common; it’s good to see it making a comeback. You can find cast iron in department and box stores, local variety stores and even mom ‘n pop stores now. Do your research; not all cast iron is created equal.
Clear the ground of any debris that might catch and spread the fire. Pine needles and dried leaves don’t look threatening but one spark in that dry tinder can cause a forest fire. I prefer a six foot clearing around the fire. If you need tinder you can use the debris. Dried birch bark is an excellent fire starter. You’ll need plenty of hardwood coals to cook on, in and under.
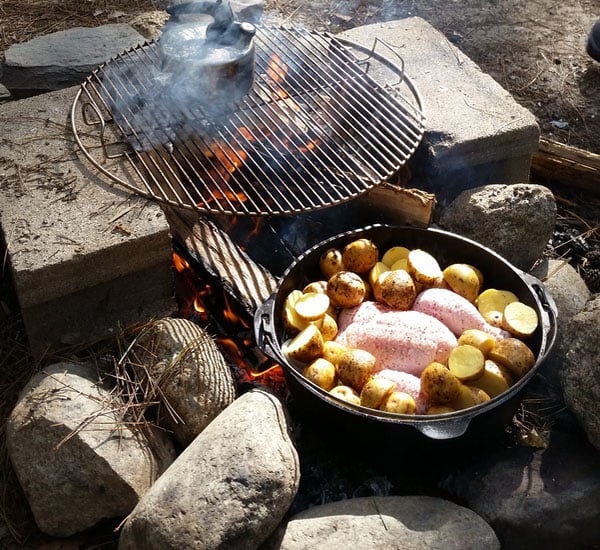
The Dutch ovens are my most used pieces over and in the campfire. You can roast a chicken, potatoes, and root vegetables in about an hour. Most anything you can bake or roast in an oven may be cooked in a Dutch oven outdoors. It might not turn out well the first time or two but you’ll get the hang of it. The taste of hot bread fresh from the Dutch isn’t the same as the glass pan in the oven at home. The flavor is richer thanks to the cast iron and wood smoke.
Look for Dutch ovens that have legs. The legs allow air to circulate beneath the oven to keep the fire even. You can place an oven without legs on the coals but it will smother then and restrict the heat to the side and top. The lid should have a lip around the edge. The lip will hold coals in place and help keep ashes out.
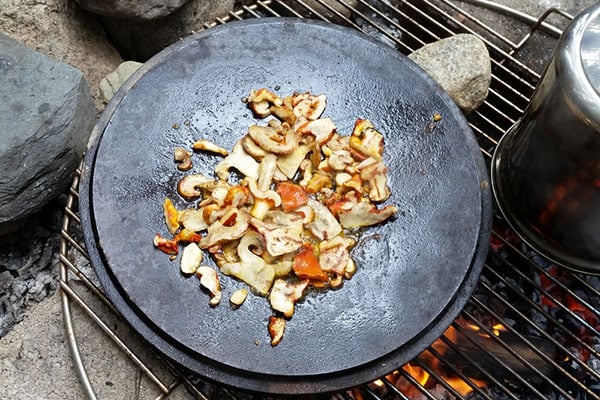
Need an extra pan when you’re cooking? Participants of a Campfire Cuisine class I taught picked lobster mushrooms and brought them to class. I didn’t have a fry pan, but I did have the cover to Dutch ovens. Flip the lid over and you’ve got yourself a fairly flat surface. Many covers are slightly domed to keep moisture dripping back into the oven, but it’s flat enough to work.
Deep skillets serve double duty for regular frying and shallow baking. If you need to save room while packing, opt for a deep skillet with a good cover. They’re good for frying, soufflé and frittata, rustic breads, soups and stews, and dessert. Shouldn’t every hardy meal end in dessert? Glass covers are great at home or camp but I don’t recommend packing it for the outdoors. Along with being fragile compared to a cast iron cover, you can’t place coals on top of glass so your option of baking is gone.
You’ll need a lid lifter. The lifter will spare your hands and gloves from burns, and it can be used to hold up and prop up lids.
This chart covers wood coals as well as charcoal briquettes. Not everyone can build a fire in the yard but with a gravel driveway, most of us can cook outdoors. Use an amount of coals equivalent to the total amount of charcoal, and spread both evenly.
If the sun is shining directly on the Dutch oven on a warm or hot day, you’ll need fewer coals. If it’s chilly or there’s a breeze that cools the cast iron, add a few more. This chart is a good start. Judge your needs based on coal size.
For roasting and baking foods like chicken, roasts, bread and desserts, use half of the coals on bottom and half on top.
For stew, which has a thicker liquid than soup, use one-quarter of the coals on bottom, three-quarters on top.
For boiling and simmering, put all of your coals on bottom. This is where the legs on the bottom of a Dutch oven are especially helpful.
8” DUTCH OVEN:
350* – 10 on top, 6 on bottom
375* – 11 on top, 6 on bottom
400* – 12 on top, 6 on bottom
450* – 14 on top, 6 on bottom
10″ DUTCH OVEN:
350* – 14 on top, 7 on bottom
375* – 16 on top, 7 on bottom
400* – 17 on top, 8 on bottom
450* – 19 on top, 10 on bottom
12″ DUTCH OVEN:
350* – 17 on top, 8 on bottom
375* – 18 on top, 9 on bottom
400* – 19 on top, 10 on bottom
450* – 22 on top, 11 on bottom
If you’re new to campfire cooking you can start with moist meals like soups and roasts. Moist meals are less likely to burn. If you want to start out with baking, give bread a try. If you completely ruin it you’ve only lost some flour and yeast, but if it’s fantastic, you’ve turned flour and yeast into a big win.
Hints & Tips for Successful Campfire Cooking
Higher heat and faster cooking isn’t better. It’s better to cook a meal longer on lower heat than faster on high heat.
Add small pieces of wood to the fire half way through cooking to ensure you’ll have enough hot coals. If you’re using charcoal briquettes, use the self-lighting kind. Add them to the heat and they’ll ignite on their own.
To sear and sauté, start with a hot pan. Everything else starts in a cold pan so that the pan and food heat evenly.
Never add cold liquid to hot pans. It can crack cast iron just like glass. Cold liquid in other pans can cause warping. This tip is easy to forget when we’re around the fire.
Line pans with non-stick heavy duty foil for easy clean up. This is very helpful for brownies and other soft desserts and baked egg dishes.
Place an unlit, “strike anywhere” match in your frying oil. When the match lights, the oil is hot enough to start frying.
Stacking Dutch Ovens
The legs on Dutch ovens are for more than air circulation. They’re stackable. Place the oven that needs the highest heat on bottom. Add coals to the top, then add the next oven. Add coals to the top, and add the next oven. I stack up to three tiers for cooking purposes, and a fourth tier if the top oven only needs to warm up food. If each layer needs the same amount of heat and time, switch them around half way through. The top layer becomes the new bottom, the middle remains in the middle, the bottom is the new top. This is a good time to add more coals or charcoal briquettes if needed.
Foil Packs
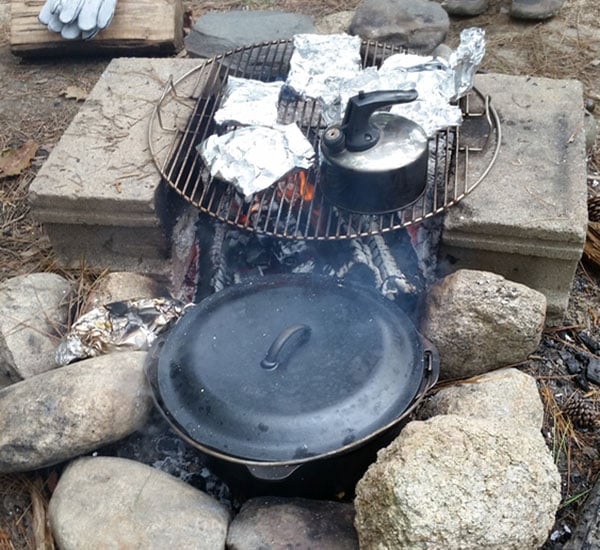
If you’re camping and don’t want to pack pots and pans in, just starting out, or want to keep this simple, use heavy duty aluminum foil. You can cook on and beside the coals as well as on the grate above the coals when your food is well wrapped. Seal the foil tightly to keep steam in and opt for longer time rather than higher heat. Some of my favorite combinations:
Slices zucchini, onion or leeks, bell or banana pepper, Italian seasoning. Add a tablespoon of olive oil to the foil.
Layer bacon and loose hash browns for a simple breakfast.
S’mores made with mini marshmallows and chocolate chips baked in waffle ice cream cone are my favorite way to enjoy S’mores. Wrap in foil, bake for three to five minutes.
Use multiple layers of aluminum foil as a pizza pan in the bottom of a Dutch oven. You can lift the pizza out and slice as usual.
Foil Pack Apple Crisp
½ cup quick cooking oats
6 tbsps. flour
3 tbsp. brown sugar
¼ cup white sugar
½ tsp apple pie spice
4 tbsps. butter
2 apples
Squeeze of lemon juice
Mix oats, flour, both sugars, and apple pie spice. Using a fork, cut about 2 tbsps. of the butter into the mixture. It will become crumbly.
Core and slice the apples. Unless the peels are very tough, don’t bother peeling.
Cut two 12” or 18” square of aluminum foil (depending on what size roll you’re using). Coat the center of each square with a tablespoon of the remaining butter. Place the oatmeal mixture on the bottom, the apples on top, and wrap securely. Make sure the edges are tight so the steam from the apples can’t escape. Bake at the edge of the coals for 20 minutes, turning about half way through. If you’re baking a lot of crisps you can place them in a Dutch oven, and heat it to 350* using the chart above.
Keep it simple and don’t over think campfire cooking. Any meal you can cook on the barbecue grill, in the oven, or on a burner in the house can be cooked on a campfire. There’s a bit of a learning curve but the trial and error might turn out delicious.
