Last Updated on
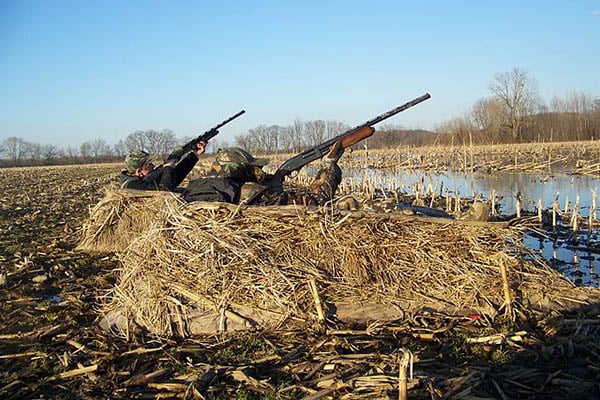
As fall approaches, it’s time to get to work on this year’s duck blind. Each year, waterfowl hunters scour each cove and bank of their local farm pond or waterway looking for the perfect spot for what they hope will be the best blind yet. Some hunters begin construction earlier than others, but if you haven’t started yet, it’s time to roll up your sleeves and spend a couple weekends making your home away from home this fall. Building a duck blind can offer plenty of opportunities to get creative or just build the basics, so without further ado, let’s take a look at the basics of building a duck blind.
Location
You first have to decide on the location of your blind. Early in the construction process, walk the entire length of the pond or area where you have permission to hunt and look for logical areas to place your blind. Ask yourself questions like: “Can I access this area somewhat easily for the entire season?” A blind that requires a treacherous hike to access will become a pain, and if you’re going to be successful this season, you’ve got to spend a lot of time in the blind.
Naturally, you’ll want to place your blind in an area where the ducks will want to land and eventually feed. Coves are popular spots for ducks as they offer food sources and a place that is out of the wind. However, placing your blind smack in the middle of that cove might not be the best option. For one, the ducks will likely land in a clear water area nearby not directly into the cove if it is filled with debris. Secondly, you may not get a good look at the sky and birds that pass if you’re bunkered down in the back of a cove. Instead try a placement on the edges of the cove that offers decent visibility and plenty of shooting lanes.
If there aren’t a lot of good landing areas near your blind, you can always break out the waders or the boat and create some yourself. This will give you a good area to place your decoys and hopefully entice some other ducks into landing in your spread.
Construction Basics
Temporary blind designs are going to consist of three main materials: wood, natural vegetation and artificial camo or burlap. You can also add the addition of chicken wire to hold up vegetation, just make sure it doesn’t stand out in your build. Spray paint in natural colors can also be of use in blind building.
A good blind all starts with the floor. You can’t very well hunt all day long in a muddy pool, so you’ll need a base that is firmly constructed above the water line. A lot of builders prefer wooden pallets as they provide a base above water but still allow for some ebb and flow of the water line underneath. If you find the gaps in the pallets annoying to stand on, you can always build a floor on top of the initial pallet layer. From there you’ll want to establish a front and back of the blind. The front should have a railing or wall that will prevent you from falling into the water and hold items like shotguns and sometimes morning coffee. The back can consist of either seating built for hunters or simply storage for gear like blind bags, gun cases, etc. The back is also the ideal place to create an entry point or set up a place for the blind heater. Don’t forget about a place for the dogs as well.
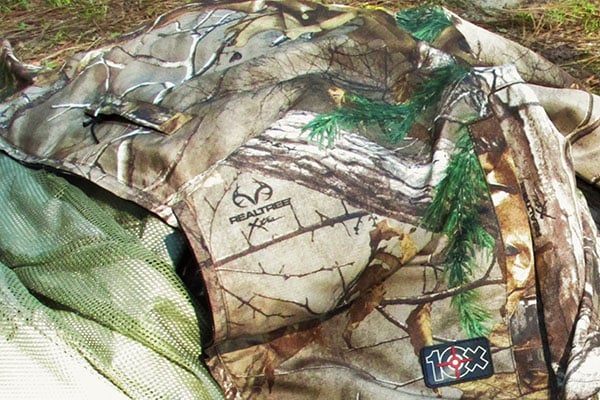
Once you have the initial frame built, you’ll want to turn your attention to concealment. A good layer of camo or burlap material is a good starter as it can cover a large area easily. Wrap the blind around with this material excluding the entry point. Make sure to select a camo pattern that is well suited for your area and that matches the natural vegetation in the area. You can also use this material to make a ceiling as long as it is properly framed. Remember, the ceiling is more for the back of the blind and shouldn’t extend too far out and block your view.
The final step is to add natural vegetation around the blind to make it look natural. The more natural vegetation the better, and make sure it extends high enough to conceal hunters even when they are standing. Resist the temptation to harvest vegetation that is right next to the blind. If you cut down everything around the blind, it will stick out like a sore thumb. While we’re on the topic, never clear cut vegetation, only take a few branches here or there leaving more to grow for next year. Secure the vegetation by tying it to the blind and sticking it deep into the mud around the blind. Make sure a heavy storm won’t blow it all down overnight and leave your blind exposed.
Integrating Prefab Blinds
Many companies make prefab blinds, or at least blinds meant to replace some portion of the temporary blind we profiled above. If you’re short on time or you’re not much of a carpenter, these blinds can work as a replacement. However, never consider these blinds a “set it and forget it” option. You’ll need to add surrounding vegetation as well as potentially frames and floors to make them work. There are so many portable blinds on the market it’s hard to describe them all, but just remember you get what you pay for, and space isn’t usually an advantage in these type of blinds. Still they can be a good starter for some intimidated by the blind building process.
Take A Step Back
So you have your basic blind all laid out and ready to go. You’ve placed a good amount of natural vegetation around and up close it looks great. Don’t stop there, take a walk around the pond or body of water and look at the blind from a distance. Does it look out of place? Ducks can be very keen on structures that look unnatural, so don’t stop honing your blind until it truly looks like it belongs.
Refine Your Approach
Each year provides an opportunity to refine your approach to duck blinds. If one year results in a miserable placement, you can always adjust next year. If you hit the nail on the head and select a killer location, then you can work on making the blind permanent in the coming years. It’s always best to start simple until you know how the blind is going to work, but don’t forget to get creative. Some hunters will say only build the bare minimum, but we disagree. Crafting some interesting upgrades and making your blind comfortable is part of the experience. Just don’t focus on it too much if you’re new to blind building, and don’t get too carried away. Your blind doesn’t need to look like a hotel room or man cave either. Keep experimenting and good luck this season.


