Last Updated on
In most snowy areas of the world, skiing and snowboarding is king. Locals and tourists alike hit the slopes every weekend, and ski and snowboarding gear fills the shelves of every outfitter. However there is another winter activity that is rewarding for many, but it doesn’t get near the press as skiing. This alternative winter activity is snowshoeing. Sure snowshoeing isn’t quite as action-packed as skiing, and often it does require more work, but it does have its rewards. Those who love hiking in the spring and summer can still get out and enjoy the trails they love, this time when they’re covered in snow. Snowshoeing can bring you to the most peaceful places you’ve ever been. So if you want to try this lesser known activity this winter, we’ve outlined some tips to get you started.
History
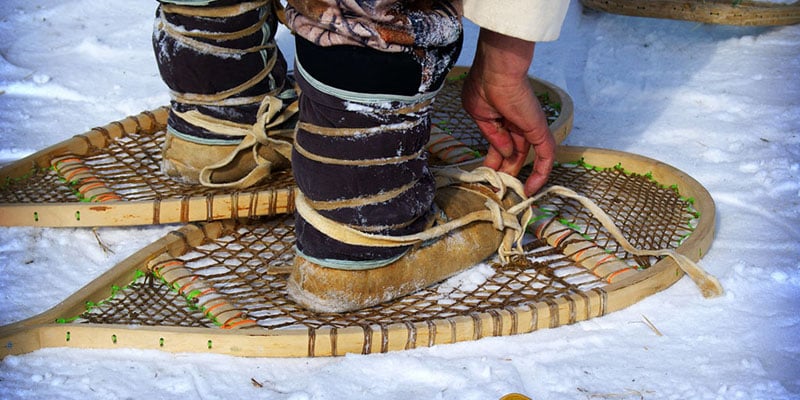
Most people are familiar with the concept of snowshoeing, even if they’ve only seen it depicted in movies or TV. The snowshoe design as we know it today, that is a large, webbed frame attached to the feet, was initially developed Native Americans. However simpler designs are found in older cultures from Central Asia dating back as long as 4000 B.C. The design was utilized by European settlers as they explored North America, and it was key to many of their early exploring, hunting and trapping efforts. Today’s snowshoes have forgone the wood and leather found in traditional shoes for lighter and stronger materials like aluminum, plastic, nylon and others. These materials allow the user to hike faster in snow and they reduce fatigue on the legs.
Basics
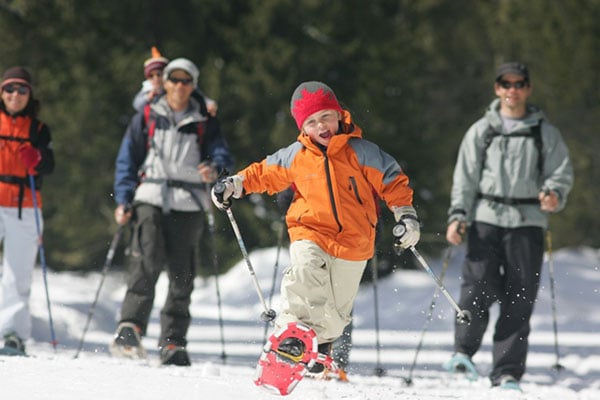
The basic snowshoe design uses a lightweight frame to create a large surface area on the snow. This larger footprint helps prevent the user’s foot from plunging into the snow, thereby reducing the amount of effort it takes to hike through deep snow. A webbing or binding attached to the frame supports the users feet, and boots are strapped to the webbing or support structure to keep the snowshoe attached. Snowshoes come in three basic sizes: sprint or racing shoes, common recreational shoes and mountaineering shoes.
Racing Snowshoes
Racing snowshoes are used for snowshoe running and racing, a unique activity that is growing in certain parts of the world. Racing shoes are short (starting at 7″ long) and extremely lightweight. When used correctly, you should be able to run while wearing them. These shoes work better when used on solid pack, groomed surfaces, but you can get off trail with them as well, it might just be harder to run in those conditions. Racers prefer to wear these snowshoes with running shoes instead of boots. Once you get the hang of running in these short snowshoes, you may be able to find a snowshoe race in your area and test your mettle against other racers.
Common Recreational Snowshoes
Most snowshoes you’ll see will be of the basic recreational variety. They will be longer than racing shoes, and often they will use a standard aluminum frame with the cleats placed in the middle of the shoe. These shoes may also have plastic “decks” to grab more surface area, often placed in the rear of the shoe. Some recreational models may include an “ascending bar” or bar that flips up under the heel to aid in climbing steep inclines. This bar reduces the effort when you’re taking steps up an incline, but when on flat ground you can snap it back down and use the shoes like normal.
Mountaineering Snowshoes
The final variety of snowshoes is designed for those that get off the grid in their snowshoeing activities. Mountaineering snowshoes have a large surface area, often extending far in front and behind the user’s feet. Tougher metal frames often replace the aluminum tube frames found in recreational shoes, and cleats can be found on the frame as well as under the wearer’s feet. Ascending bars are almost always part of a mountaineering snowshoes’ design.
Snowshoeing Gear
In addition to the snowshoes, there are several must-have items you’ll need to make your snowshoeing trip a success. Warm, breathable clothing is vital, and you’ll want to dress in layers as you can build up a sweat hiking too hard in snowshoes. Here is a basic checklist of what you’ll need:
- Boots (or shoes if racing) – Waterproof, breathable footwear is a must in snowshoeing, and it’s nice to have ample ankle support in the boots you choose.
- Socks – Thick, warm winter socks are important part of your snowshoeing setup. Remember that socks that breathe and wick moisture away are just as important as warm socks.
- Trekking Poles – Similar to ski poles, trekking poles make it easier to negotiate terrain while wearing snowshoes. They are especially important when tackling an incline or decline. Trekking poles should be lightweight yet strong, and in a pinch you can use your ski poles. Make sure they are well-suited for your height as you don’t want poles that are too short or long for you.
- Base Layer – A must for any winter activity, the right base layer should be warm yet wick moisture away when you’re active.
- Mid-Layer – A good option for those times when you’re warming up but not “too warm,” the mid-layer provides insulation when you need it. Mid layers are fairly thin and should fit under your outer layer or heavy coat and pants.
- Outer Layer – The outer layer is tough enough to fight wind and shed rain and snow. Waterproof yet breathable materials like Gore-Tex are perfect for the job. On a warm day or when you get too hot while snowshoeing, you can either shed the outer layer or remove the mid-layer and put back on the outer layer to regulate temperature.
- Gloves – Your hands will be exposed when snowshoeing, especially if you’re using trekking poles. Get some heavy duty gloves that will keep your hands warm, especially when it’s snowing and the wind is blowing.
- Headwear – You’ll need a good winter stocking cap for any snowshoeing trip.
- Sunglasses – The snow can really blind you when the sun is out, and a pair of sunglasses are a necessary part of any snowshoe setup. Bring them along even when it’s cloudy, you never know when the conditions might change.
- Hydration – A snowshoeing trip can leave you pretty dehydrated, and you may not notice it as much because of the cold weather. Bring plenty of water along either in a hydration pack or water bottle(s).
- Head Lamp – It may seem over-cautious, but it gets dark quickly in the winter and snowy landscapes can look all the same. So if you get lost and it gets late, a headlamp will help you find your way out.
Strategy
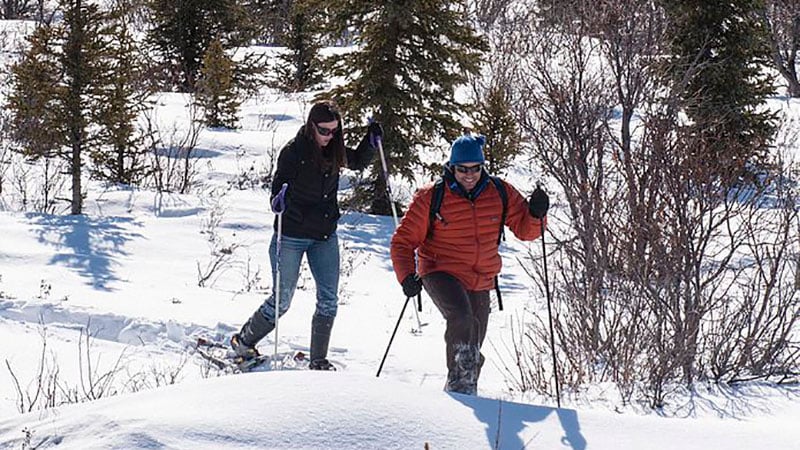
It is relatively easy to get started snowshoeing, although it can take some time to get used to the added bulk of snowshoes strapped to your feet. In addition, it is common to get crossed up, or have one snowshoe snag on the other as you hike. Snowshoe fatigue is also common after your first trip or two, and expect your legs to be a bit sore after the first time out. This said, you’ll find that most adhere to the gait required in snowshoeing fairly quickly, and the freedom to walk in thick snow can take you some interesting places.
Ascending a steep hill can provide more of a challenge, and in cases like this, you may need to take a diagonal route or sidestep up the hill to traverse it safely. You may also need to kick step, or firmly kick the snowshoe cleats into the hill to ensure you have a proper grip. Going down on the other hand can be a breeze, and you’ll find that the wide surface area of the snowshoe makes for a pleasant “bounding” experience down hills as long as they aren’t too steep.
One last note, snowshoeing can take you to places with potential avalanche danger, and it’s best to avoid possible avalanche areas until you’re properly trained to diagnose and traverse such areas. You’ll need safety precautions such as avalanche beacons, and tackling such terrain is only for experts who know the risk they’re taking. If you stay on forest trails and other approved areas, you’ll have no problems and you’ll enjoy the snowshoeing experience.
Image one and thumb, two and three courtesy of Wikimedia Commons.
